
Here is another kind of fabric flower that I love to make. It’s a technique I learned somewhere else on the interweb, but I’ve made a few alterations to the process. This is kind of a long one, I got really thorough with the photographs. (And please excuse my gross finger nails, I’ve been doing a lot of gardening lately!)
Ok, let’s do this.
Step 1. Cut out 6 squares from the fabric of choice. I think these were about 2.5 inch squares. I tend to like to make them a little smaller than these, but start on the big side and go smaller when you get used to the folding.
 Step 2. Folding the Petals
The next few images will take you through the folding process. First you fold the square in half.
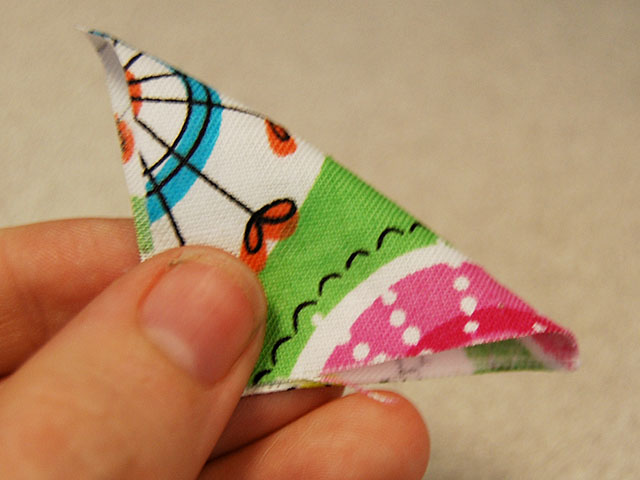 Then you bring two of the corners down to the bottom point.
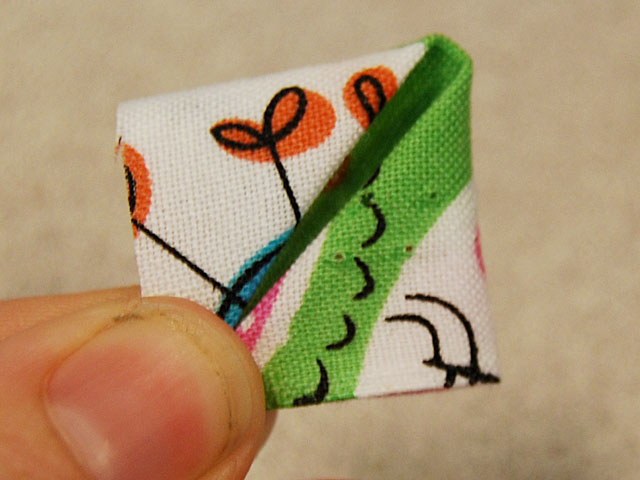 Next, you flip the square over and bring the edges to the center, as shown.
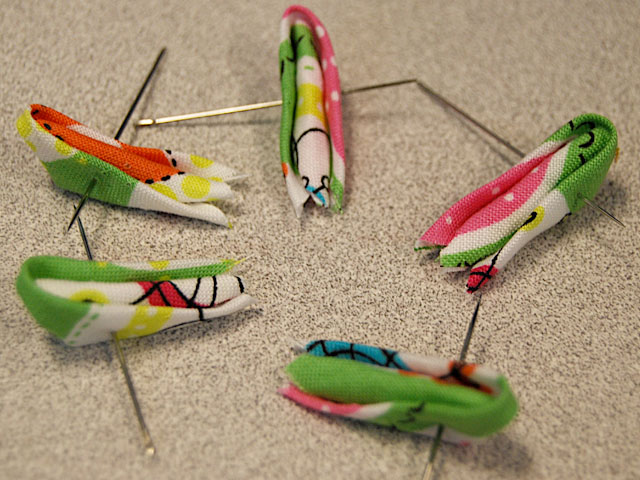
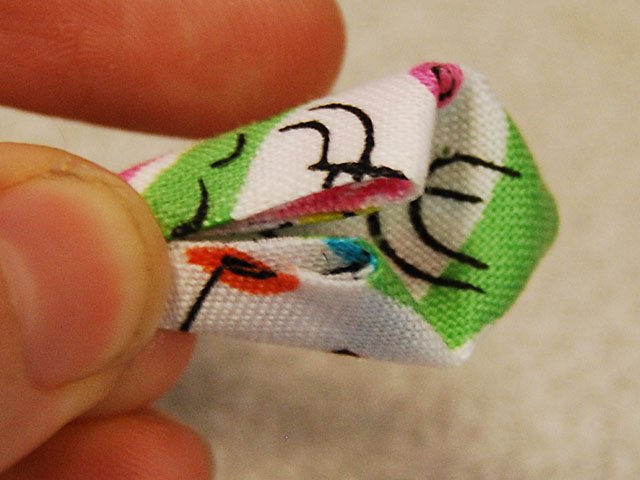 Finally, you fold the petal in half and stick a pin through it so it will hold it’s shape. Do this for all 6 fabric squares.
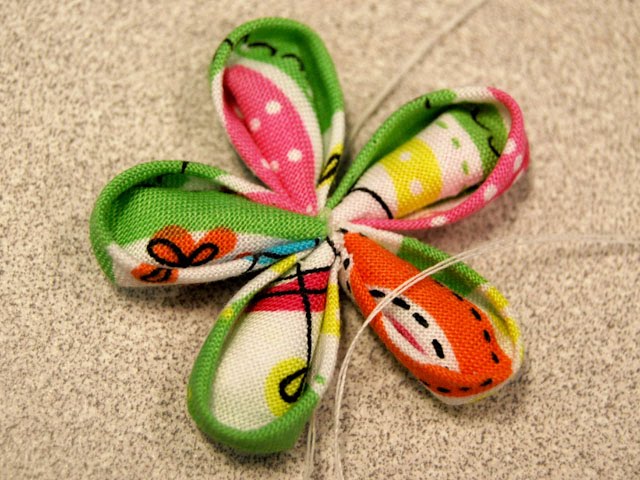
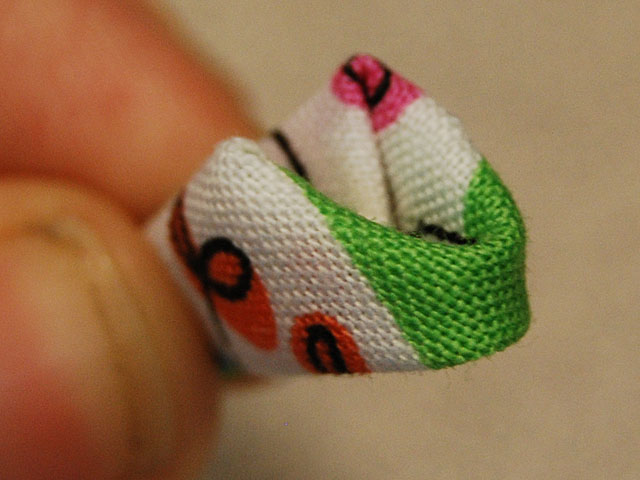 The finished product should look like this.
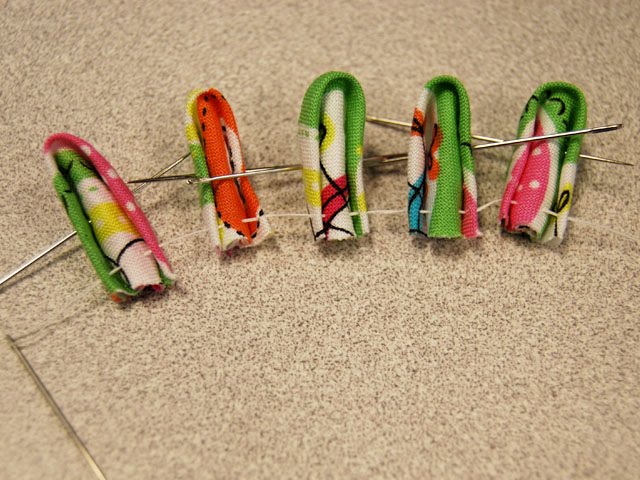
 Step 3. Double thread a needle and string all of the petals at the same point, so they’ll all be the same size. Next, clip off the excess fabric at the corners like in the photo.
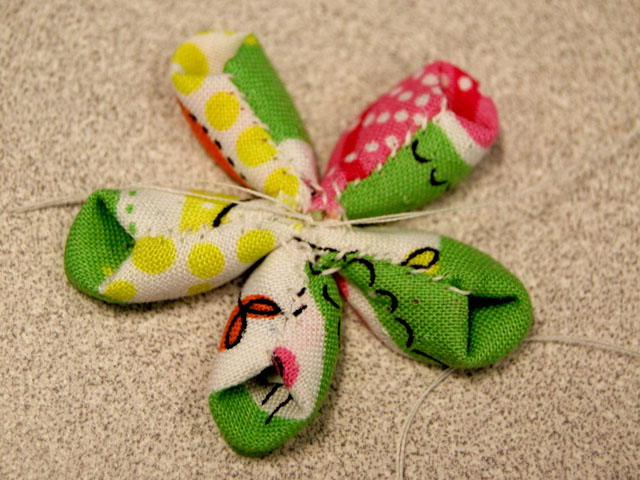
 Step 4. Pull the string tight and tie a nice, tight triple knot. This will give you the general shape of the flower. I like to keep the needles in each petal to help keep the shape through the next few steps. So be careful not to stab yourself! Like I’ve done many many times… You can take them out, you don’t have to be sadistic like me.
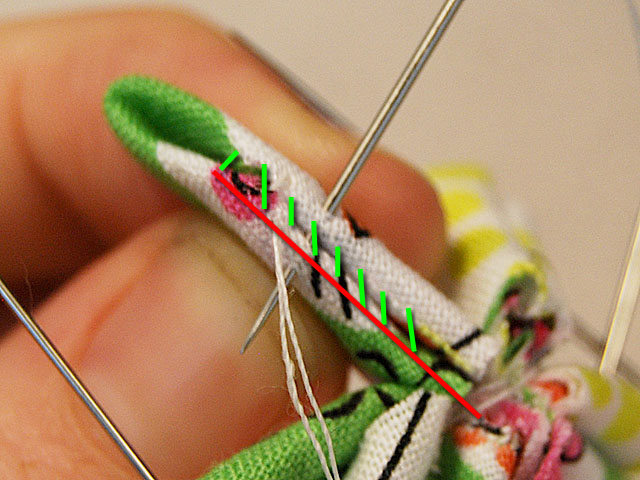
 Step 5. This is where my technique varies some from other tutorials you’ll find on the web. I like to sew the back of each petal because I feel like it gives it a more finished look and helps the flower to keep it’s shape a lot better.
You’re going to send the needle up through the folded edge of the back of the petal. (The red line in the photo) And then do a few quick, simple stitches all the way down the seam. (The green lines in the photo) After I do the first stitch in this step is when I like to remove the needle from the petal I’m working on.
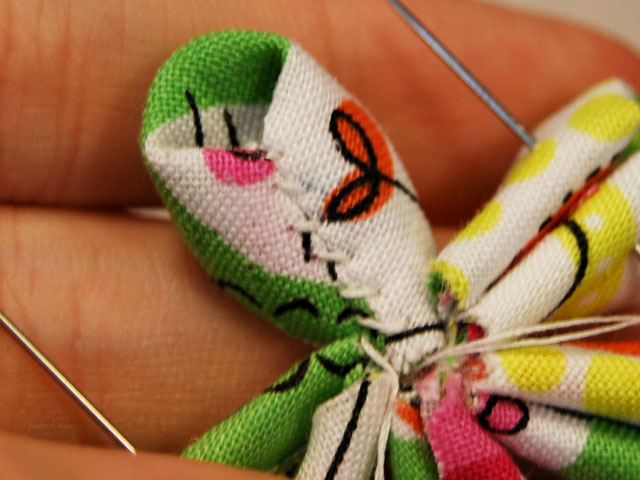 When you reach the bottom of the petal, send the needle up through the next one and continue until all of the petals have been sewn. You can then tie a knot. (But don’t cut the thread yet, you’ll still need it)
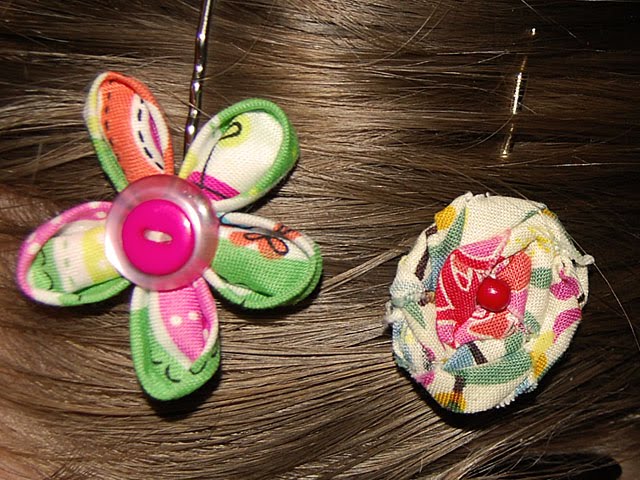
 Step 6. Use the extra thread to sew a button to the front of the flower and you’re done! (I sewed two buttons on because I like the way it looked, have fun with it!) I have a bunch of those bobby pins that have a round metal base, they’re great for making these flowers into cute hair accessories. (And here is the finished twist rose from my last tutorial.)


I really like this origami flower! I'm going to try it with some of my extra fabric!
You should! They're fun
Love it! Thanks for the idea.I've been trying my hand at stuff like this lately… I'm loving the inspiration from you guys! I'm from tip junkie.
oooh thank you so much…i just came over from tip junkie and this is an awesome tute!!! U rock!