Last year I made a few fabric brooches as Christmas gifts using dark t-shirt iron on paper. (I love that stuff.) The process is very simple, and they’re fun to make. I was working on a handful of them last night so I decided to make a mini DIY for you all. This tiny Tardis will be flying to CT next week, but I made a second one for me to keep. Of course. I’ll share the other ones I made another day.

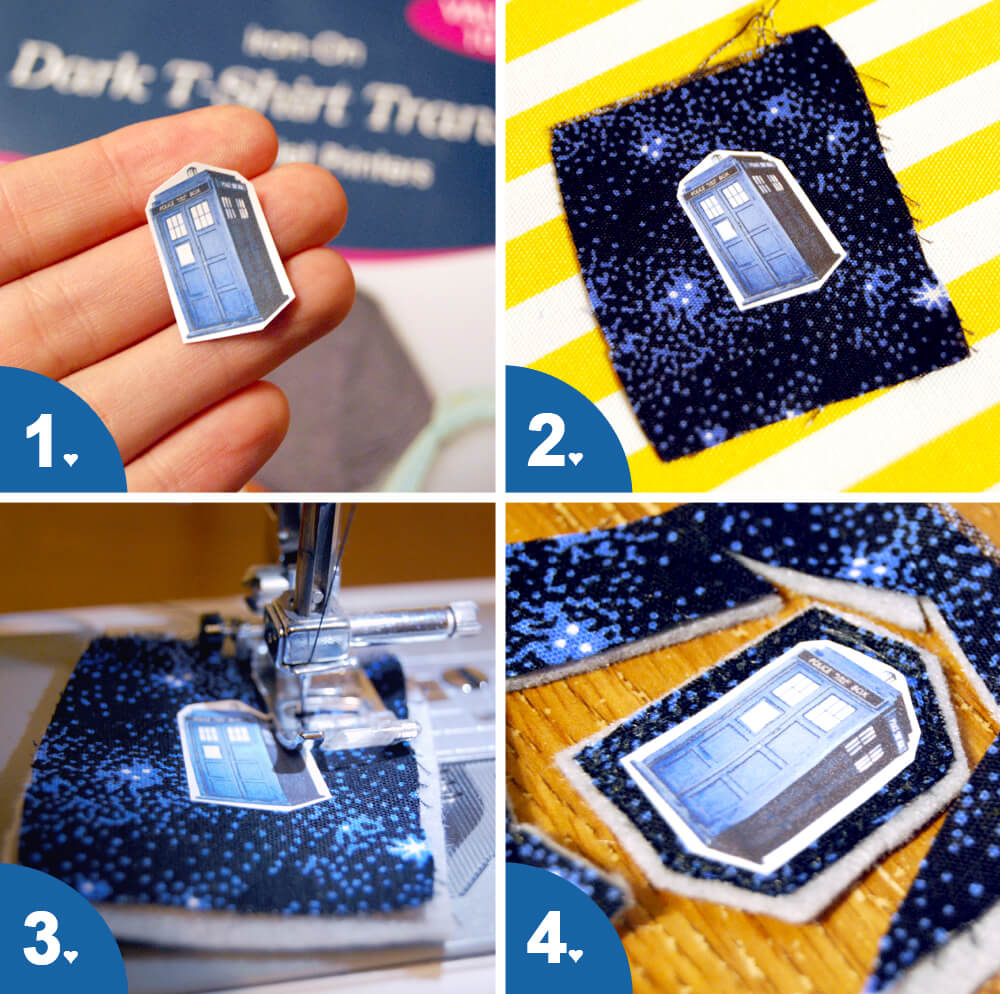
- Print your design onto dark t-shirt iron on paper and cut it out, leaving as much or as little white border as you want.
- Peel the paper backing off of the transfer paper and place it, design up, onto a piece of fabric. Carefully iron it down. (It helps to place another piece of fabric over the top before ironing.)
- Cut an equally sized piece of felt and layer it under the fabric. Sew through both layers around your design. Once again, you can stitch as close to or as far away from the design as you want.
- Cut out your design. For this brooch I decided to cut the fabric a bit more than the felt so it had more of a border.
All you have to do next is find a pin back and stick it on! I’ve used the sew-on ones, and I’ve attached others with E6000 glue, depending on what I have available. I prefer using the glue because I HATE hand sewing. I made another one last night using one of my watercolor paintings and I love how it turned out. I may end up designing a bunch of cute paintings specifically for brooches, to sell in my Etsy shop.


Oh my gosh! So cute! I need a TARDIS brooch obviously! I wish I would have thought of this for our wedding to add it to the groomsmen’s boutonnieres!
PS…I just found you though Little Lady Little City & your site is adorable!
-Sarah
http://www.newwavedomesticity.com