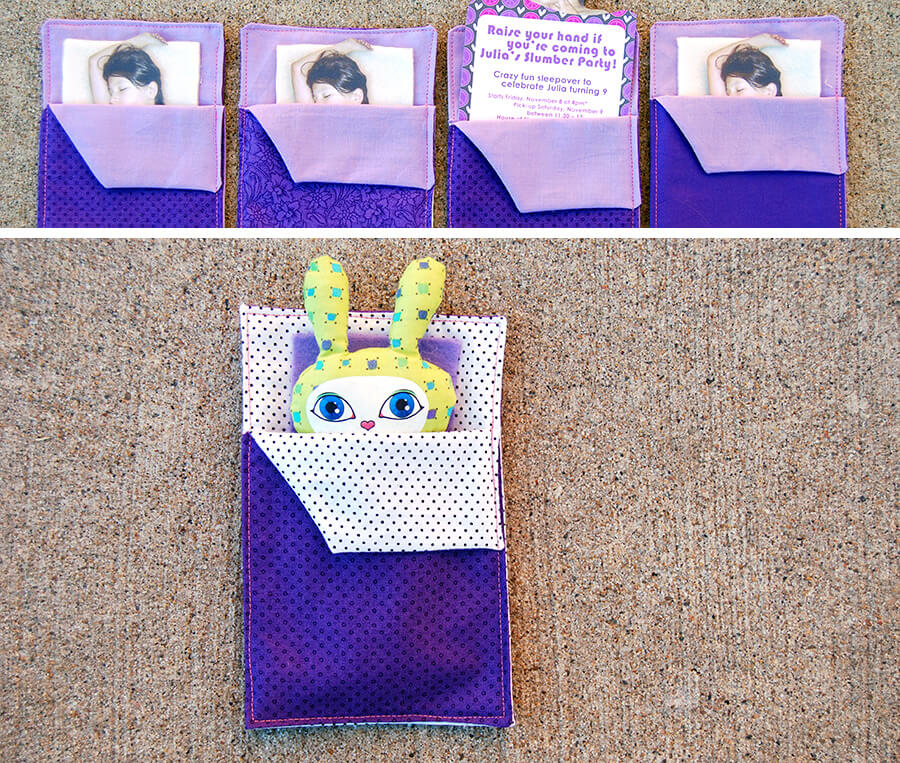
A couple of weeks ago I got to work on a fun project. My friend’s daughter is having a slumber party and she asked me to design the invitations. Then a quick Photoshop project turned into sewing a dozen tiny sleeping bags!
It just so happened that this silly little green rabbit thing fit perfectly into the bags, so I included it in a special bed just for the birthday girl. I made that doll YEARS ago when Juniper was a baby. The plan was to sell them, but I never did. Julia loved that silly thing! So much that her mom asked me if I could send over a few more to use as party favors. Hence this zoo was born:
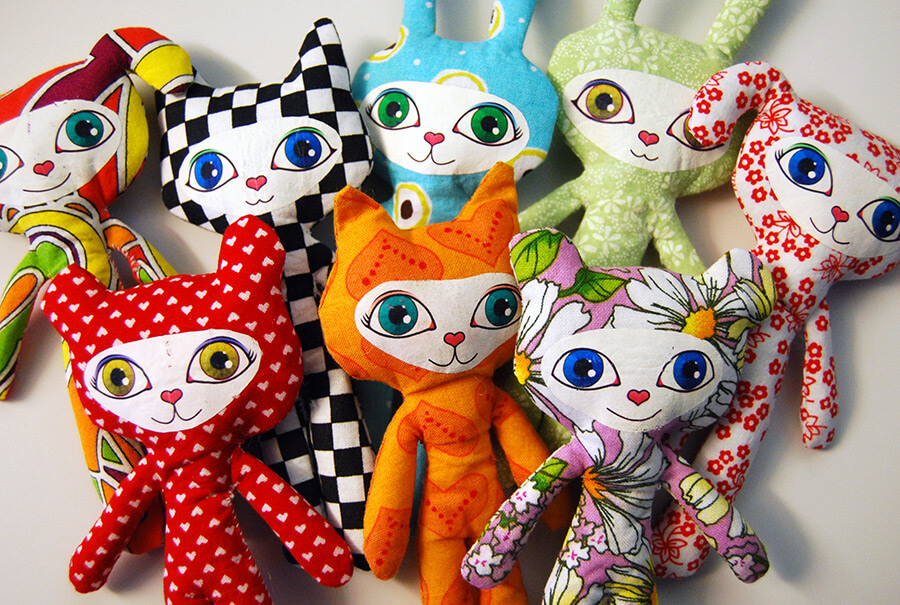
They really are cute, but such a pain in the butt to make. They’re just so tiny. They’re arms are especially hard to flip. I’m glad I still had those little faces printed on iron on material though!! Made for a relatively quick project. Juniper was disappointed that these weren’t for her. We have had these dolls around the house literally her whole life, and she never showed much interest in them. UNTIL I sent them to another kid, now all of a sudden they were her all time favorite toys and when she was little she was covered in them and life was great. (Ok Juniper. Whatever you say.)
Anyhow, my friend Lia asked me to show her how to make these cute sleeping bags so I thought I’d post a quick tutorial. Here you go Lia! I hope this makes sense.
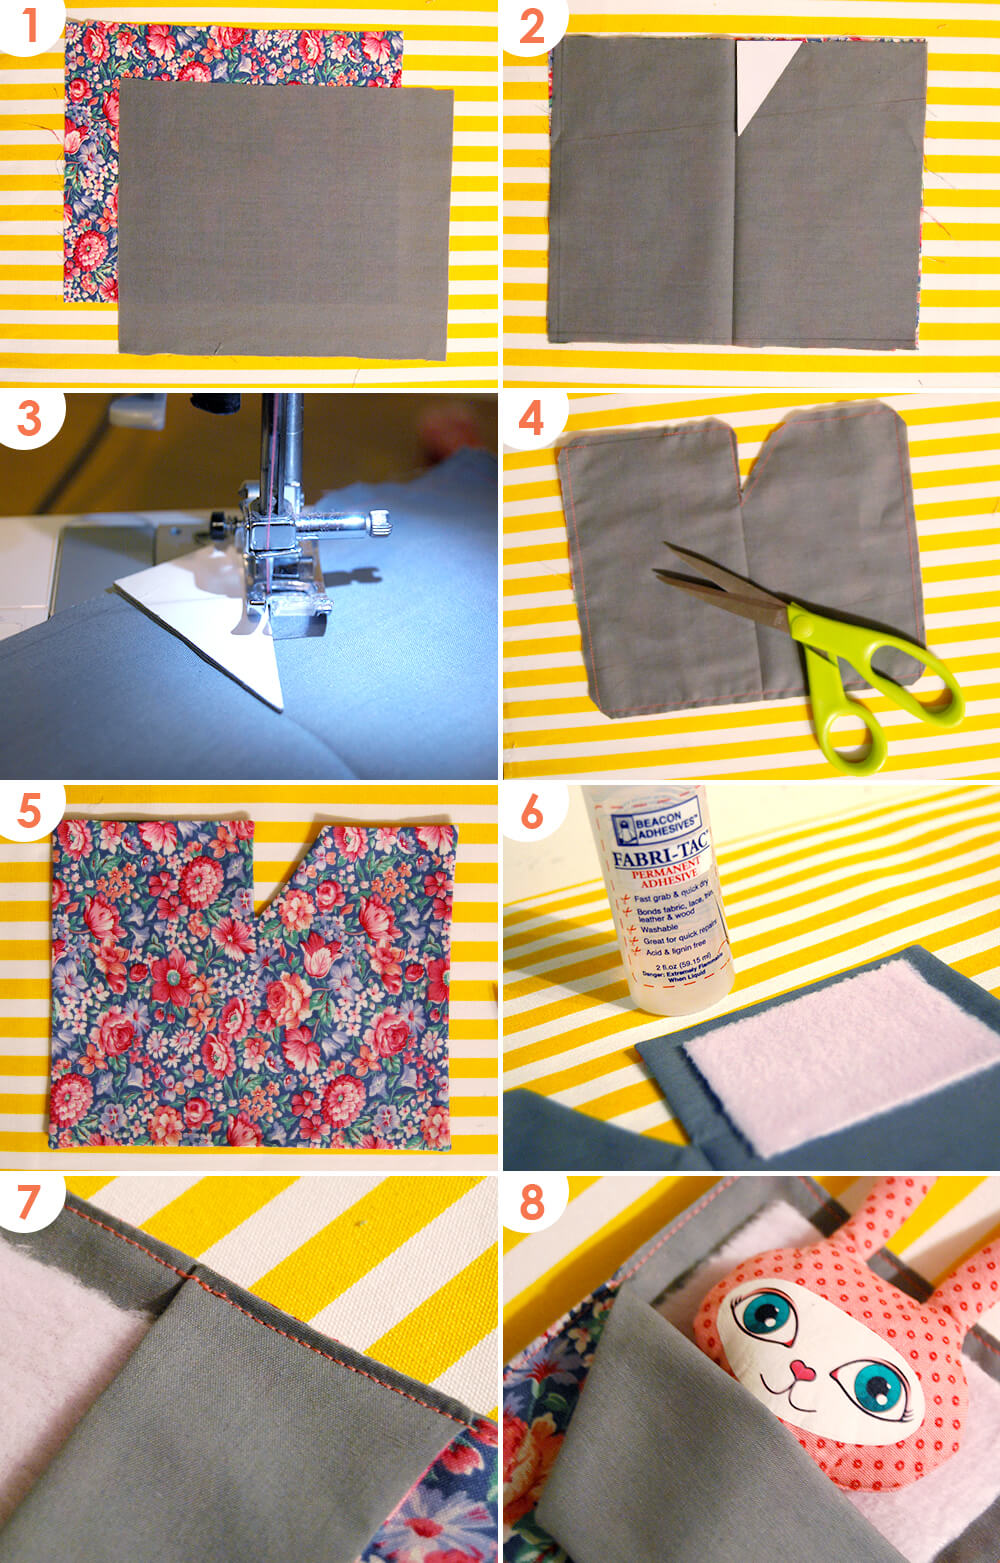
- Cut two rectangles of fabric, both 8.5×7 inches.
- Place the two pieces of fabric together, right sides facing each other, and iron a crease down the middle. I cut a triangle from cardboard to help with the next step.
- Sew all the way around the rectangles, leaving a 2 inch gap to flip later. I use the triangle piece as a guide for the little indent part. (This all made so much more sense in my head. Sorry if it’s confusing!)
- Trim off all of the corners, and cut out the triangle. Iron the bag to set the stitches.
- Flip the bag and give it another go with the iron.
- Cut a small square a fleece or felt and glue it inside the bag. (The pillow, obviously.)
- Fold the bag in half, flip the blanket down, line up all the edges, and sew as close to the edge as you can all the way around.
- Add your invitation! Or a random little bunny person thing.
I was planning on designing an invitation template, but I didn’t have much time this week. It’s pretty easy to figure out though. Maybe someday I’ll update this with some instructions for that part. If you make some sleeping bags, let me know! I’d love to see them.


I found it interesting that you took the triangle out of the middle. Wouldn’t it have been easier to just whack off one corner? Dunno.
It’s wicked cute though. I love the little anipeeps. *grin*
You take it out of the middle so you can fold down that front section.
I have plans to do a lot of sewing in the new year. It’s actually one of my goals for next year. I would love to try this for my girls. Eliminating store bought plastic junk toys is also on my list so this would be perfect for their handmade dolls.
I’ll be doing a LOT of eliminating of lame plastic toys around here as well. If you do sew some of these post them on Instagram! I’d love to see.
Yes! Thank you! I am totally making these for the bachelorette sleepover party I am planning! (Luckily not very many people are invited so it won’t be too much work!)
I want to see how they turn out!
Just so you know… I am IN LOVE with these little dolls. I saw them on Instagram and thought how adorable they were.
Thanks It took a bit of experimenting back in the day, but I really like the pattern I came up with. They’re just so tiny! I might try enlarging the pattern. Who knows, maybe I’ll actually start selling them like I planned to 5 years ago!